How to Replace Espresso Machine Feet Properly
A machine that rocks when you lock in a portafilter is more than an annoyance. It can make tamping and brewing feel inconsistent, scratch a carefully finished counter, and put unnecessary stress on the machine chassis. If you need to replace espresso machine feet, the right approach is not simply buying four pads that look close enough. You need to identify how the original feet mount, match the thread or footprint, and choose a material that suits both the machine’s weight and your coffee bar.
For prosumer machines, feet are small components with a big job. They level the machine, create clearance below the base, protect the counter from heat and moisture, and keep the machine planted while you work. A well-chosen replacement can also be a subtle visual upgrade, especially on a setup with a custom portafilter handle, steam knob, or other handcrafted details.
When Should You Replace Espresso Machine Feet?
Rubber feet do not last forever. Heat, cleaning chemicals, countertop moisture, and the repeated force of brewing gradually harden or flatten them. The problem often starts quietly: one foot leaves a dark mark, the machine slides a little during portafilter lock-in, or a corner begins to wobble.
Replace the feet when rubber is cracked, sticky, flattened, torn, or missing. Also take action if a metal foot has lost its protective pad and is now sitting directly on stone, wood, or laminate. A machine can appear level while still transferring vibration and pressure unevenly through a damaged foot.
A cosmetic change is a valid reason, too, but function comes first. A handsome wooden or metal-accented foot should still have a stable base, enough load capacity, and a design that does not trap water beneath the machine.
Identify the Mounting Style Before Ordering
Turn off the machine, unplug it, and let it cool completely before inspecting the underside. If the machine has recently been used, remember that the boiler, group, and base plate may remain hot longer than expected. Remove the water tank and drip tray if that makes the machine easier to handle, then place it on a folded towel or other padded surface with help from another person when needed.
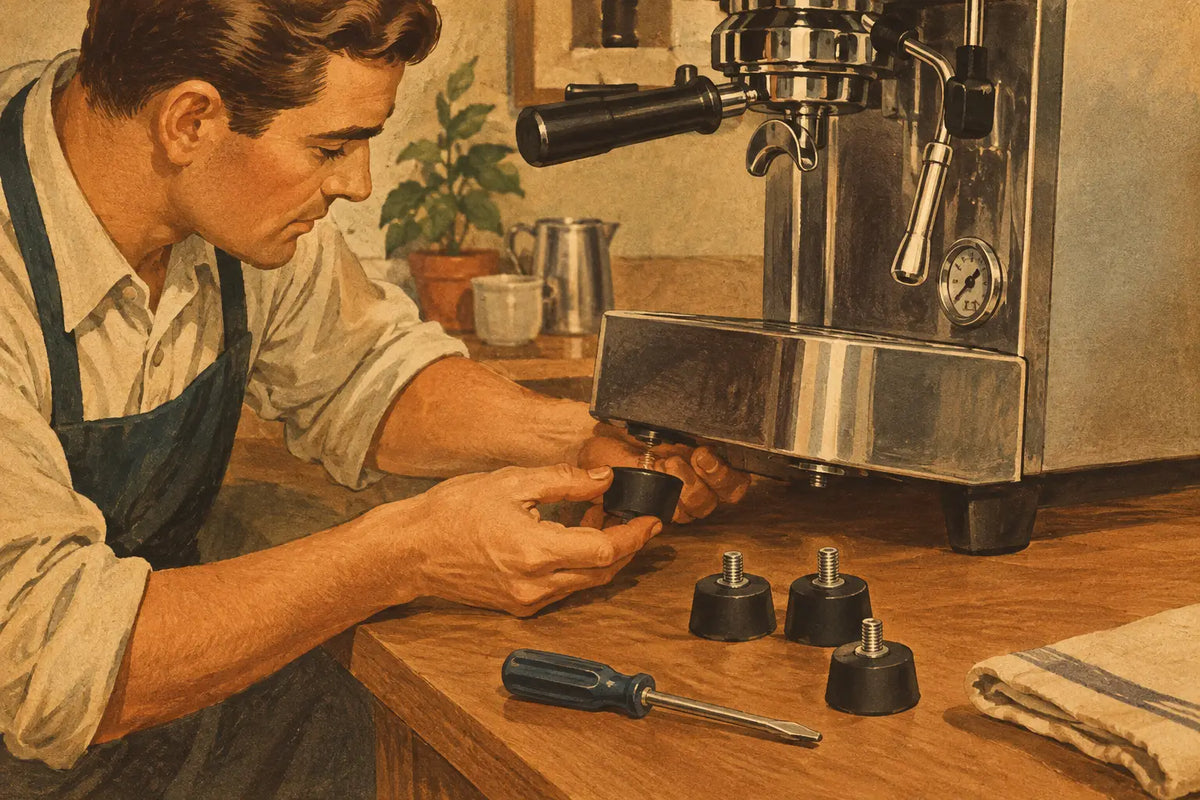
Most espresso machine feet fall into one of three designs. Threaded leveling feet screw directly into a chassis insert or nut. Push-in feet use a stem that presses into a hole in the base. Adhesive pads attach to a flat underside and are more common on smaller appliances, grinders, or replacement jobs where the original foot was a simple rubber bumper.
Threaded feet are common on heavier machines from brands such as ECM, Profitec, Rocket, Lelit, Bezzera, and La Marzocco. They may look universal, but thread diameter and pitch are not universal. Even a tiny mismatch can cross-thread the insert, damage the chassis, or leave the foot loose.
Before you buy, record the machine brand, exact model, approximate production year, number of feet, and the way each foot attaches. Measure the threaded stem diameter and exposed length with calipers if possible. For a push-in foot, measure the hole diameter and stem shape. For adhesive feet, measure the available flat area and the original foot diameter.
Check More Than Thread Size
Fitment is not only about whether a foot screws in. The replacement must also provide the correct height and clearance. Too-short feet can reduce airflow under the machine and make it harder to clean beneath it. Too-tall feet can change the cup clearance, raise the group height beyond your preferred workflow, or make a tall machine awkward under cabinets.
Pay attention to the original base geometry. Some machines use feet near the corners; others place them farther inward under a recessed chassis. A wide foot may interfere with a bottom panel, fastener, drain fitting, or a rubber edge strip. A narrow foot may fit physically but concentrate too much weight on a delicate countertop.
The base material matters as well. Soft silicone grips well and protects surfaces, but it can collect lint and may feel too flexible under a very heavy dual-boiler machine. Firm rubber offers good stability and is often closest to an OEM feel. Metal feet can look excellent, particularly with wood-accented accessories, but they need a non-marking contact pad underneath. Bare metal against stone or wood is rarely a good long-term choice.
If you are choosing wood-accented feet, look for a construction that separates the decorative material from the counter contact point. Wood brings warmth to a stainless espresso machine, but the part touching the counter should be designed for moisture resistance, grip, and everyday cleaning.
A Careful Way to Replace Espresso Machine Feet
The installation itself is usually straightforward, provided the fitment is right. Work on a clean, padded bench or counter and avoid placing the machine on its side if the manufacturer warns against it. For very heavy machines, two people are safer than trying to hold the machine up with one hand while threading a foot with the other.
Start by removing one old foot and comparing it directly to the new one. Check the stem, thread, shoulder, overall height, base diameter, and contact material. If the first replacement does not thread in smoothly by hand, stop. Do not force it with pliers or a wrench.
For threaded feet, turn the new part clockwise by hand until it seats. It should engage easily for several turns. Tighten only enough to seat the foot securely, then use the adjustment range to level the machine. Over-tightening can strip a threaded insert or compress a rubber base unnecessarily.
For push-in feet, clean the mounting hole first. Old rubber fragments or residue can prevent the new stem from seating fully. Press the foot in evenly rather than levering it from one side. For adhesive pads, remove old adhesive completely, clean the surface with an appropriate residue-free cleaner, and let it dry before applying the new pad. Adhesive feet need full contact with a clean, flat surface to stay put under heat and vibration.
Once all feet are installed, return the machine to its normal position and check for rocking. Press gently on each corner, then lock in a portafilter and mimic your usual workflow. If the machine shifts, adjust threaded feet in small increments or recheck whether a pad has seated evenly.
Leveling Is About Stability, Not Just the Bubble
Many owners use a small level on the cup tray, and that is useful, especially for machines with a drip tray that drains toward one side. But the more practical test is whether the machine remains planted during a normal espresso routine.
A machine that is perfectly level but slides on polished quartz is not properly set up. Likewise, a machine can be stable yet slightly off level, which may affect drip tray drainage or make water pool in an inconvenient spot. Aim for both: firm footing and a level working surface.
Check again after a few days. Rubber and silicone can settle under the machine’s weight, particularly after the first heat cycles. This is also a good time to inspect for moisture under the base. A small leak from a drip tray, drain line, or water reservoir can soften some pads and leave marks on wood counters.
Choosing OEM, Universal, or Custom Replacement Feet
OEM replacements are the safest choice when you want original height, material, and engineering with minimal guesswork. They are especially sensible for machines still under warranty or models with unusual mounting hardware.
Universal feet can work well when the dimensions truly match and the machine uses a common threaded mount. Their trade-off is that a listing may describe a broad brand range without accounting for year-to-year changes, chassis revisions, or different foot heights within the same product family.
Custom feet make sense when you want a specific finish, a taller or wider stance, or an accessory that matches the character of the rest of your station. This route requires more communication and better measurements, but it can produce a cleaner result than adapting generic hardware. For uncommon machines or a coordinated wood-accented setup, a maker-led shop such as NepoCoffee can help confirm the details before a custom order moves forward.
A Few Fitment Mistakes to Avoid
Do not assume that four matching-looking feet are interchangeable. Avoid forcing an uncertain thread, stacking pads to create height, or using soft furniture sliders under a hot, heavy machine. Furniture sliders reduce friction, which is the opposite of what you need when locking in a portafilter.
Also avoid replacing only one foot with a different height or hardness unless it is an exact match. Uneven compression can leave the machine twisted slightly on the counter. If one original rubber foot has failed from age, the remaining feet are often close behind it, so replacing the full set is usually the smarter move.
The best replacement feet disappear into your workflow. Your machine stays steady, your countertop stays protected, and every morning starts with the satisfying feel of equipment that is properly supported from the ground up.