How to Measure Portafilter Threads Correctly
A beautiful replacement handle is only an upgrade if it fits like it belongs on your machine. Knowing how to measure portafilter threads takes a few basic tools and a careful look at the connection point, but it prevents the most common custom-order mistake: ordering a handle that is close, yet cannot safely thread onto the portafilter.
For most home espresso machines, the measurement that matters is the threaded stud extending from the portafilter body. That stud accepts the female-threaded opening in the handle. Your goal is to identify its diameter, thread pitch, usable thread length, and any details around the collar that may affect the final fit.
First, confirm which threads you are measuring
The word “portafilter threads” can mean different things. Basket threads, spout threads, and the threads used for a detachable handle are not interchangeable. If you are replacing or customizing a handle, focus on the threaded post between the portafilter body and the existing handle.
Remove the handle before measuring whenever possible. Look at the exposed post on the metal portafilter body. This is usually a male thread. If the post stays inside the handle or your portafilter has an unusual construction, measure the matching threaded section and take clear photos of both parts before ordering a replacement.
Do not estimate from the group head size. A 58 mm portafilter refers to basket diameter, not handle-thread size. Two machines with 58 mm baskets can use entirely different handle connections.
Tools that give you a reliable measurement
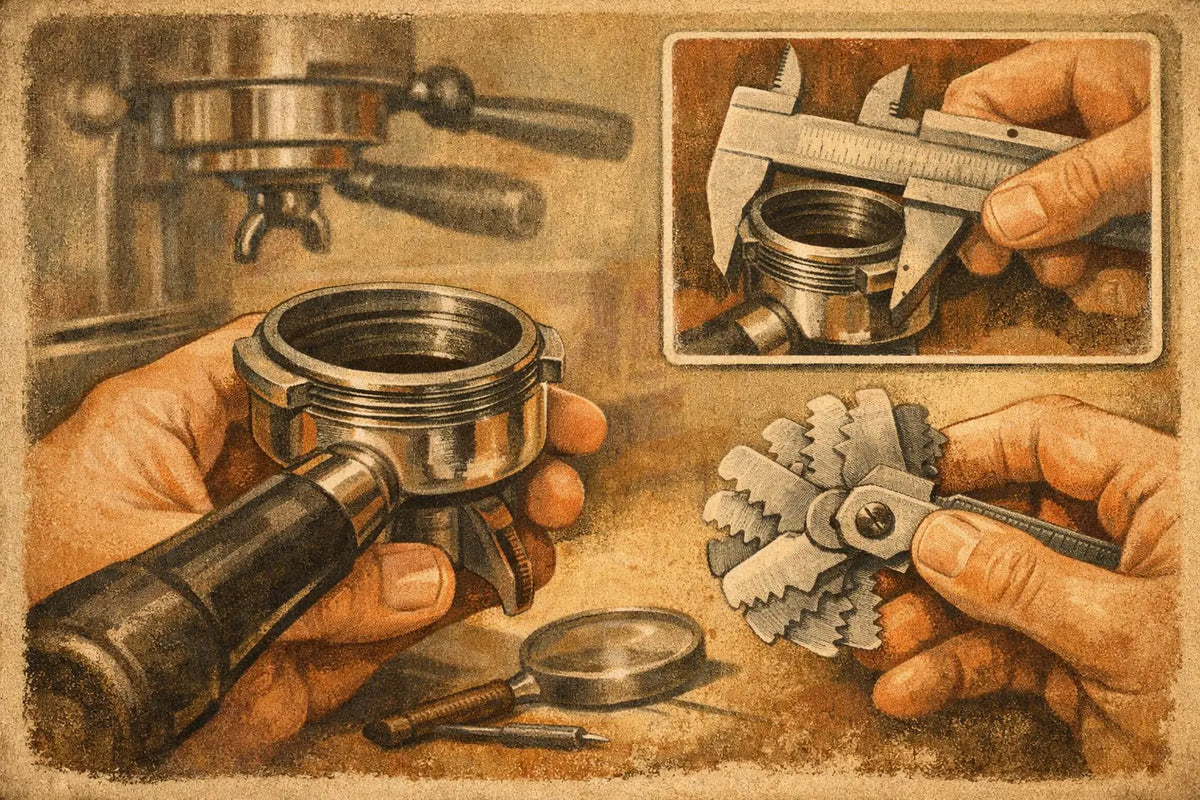
A digital caliper and a thread pitch gauge provide the cleanest answer. They are inexpensive workshop tools, and anyone who regularly modifies espresso equipment will get plenty of use from them. A ruler can help with thread length, but it is less dependable for diameter and pitch.
For a confident measurement, gather a digital caliper, a metric thread pitch gauge, an imperial thread gauge if you suspect an older or non-metric part, a small brush or cloth, and good lighting. A phone camera is useful for documenting the thread and portafilter shape.
Clean coffee oils, old thread sealant, and loose debris off the exposed stud first. Even a thin layer of residue can make a caliper reading look larger than it really is. Wipe the threads dry, then inspect them for flattening, cross-threading, or damage before measuring.
How to measure portafilter threads step by step
Start with the outside diameter of the male threaded stud. Open the caliper jaws and place them across the highest points of the threads, also called the thread crests. Take the reading without squeezing the jaws into the metal. Measure in two or three positions and use the consistent result.
A reading near 10 mm usually points to an M10 thread. A reading near 12 mm may be M12. Metric thread sizes are named for this nominal major diameter, so a stud that reads 9.8 to 10.0 mm is commonly identified as M10. Small production tolerances, wear, and the angle of your caliper can change the displayed number slightly.
Next, determine pitch. For metric threads, pitch is the distance from one thread crest to the next, measured in millimeters. Match your thread pitch gauge against the stud until a blade sits neatly in every groove with no visible gaps. A common result might be M10 x 1.5, meaning a 10 mm major diameter and 1.5 mm pitch.
If you do not have a pitch gauge, measure across several threads instead of one. For example, measure the distance from the first crest to the eleventh crest, then divide by ten. This is more accurate than trying to measure a single gap with a ruler. Still, a gauge is worth using when you are ordering a handcrafted handle, because two pitches can look almost identical by eye.
Some parts use imperial threads, identified by diameter and threads per inch rather than metric pitch. An imperial gauge will show a number such as 16 TPI. Do not convert a measurement loosely and assume the result is correct. Metric and imperial threads can appear close enough to start threading, then bind or damage each other after a turn or two.
Finally, measure usable thread length. This is the length of the threaded stud from the shoulder of the portafilter body to its tip. The shoulder is where the thread begins, not the point where the handle or decorative collar happened to sit. Record the total exposed threaded length and note whether the stud ends in a flat tip, taper, or unthreaded section.
Record more than diameter and pitch
Thread size answers only part of the fitment question. A replacement handle also needs to seat at the correct depth and sit at the correct angle when tightened. That is especially relevant on portafilters with a metal collar, a wide shoulder, or an offset handle position.
Measure the diameter of the smooth section or shoulder directly behind the threads. If your existing handle has a collar, measure its outside diameter and the depth from the handle face to the threaded opening. These details help ensure a new wooden handle sits flush rather than leaving an unwanted gap or bottoming out before it is fully secure.
Take photos from the side, front, and top with the handle removed. Include one photo with a caliper reading visible if possible. Also note your espresso machine brand, exact model, portafilter type, and whether it is original equipment or an aftermarket bottomless or spouted portafilter. A replacement portafilter can use different threads than the machine it was purchased for.
Common thread sizes and why assumptions cause trouble
M10 x 1.5 is widely seen on many portafilter handles, but “widely seen” is not the same as universal. M8, M10, M12, fine-pitch metric threads, and brand-specific arrangements all exist. A compatible handle for one E61-style portafilter may not fit another without an adapter or a different insert.
Machine families can also change over time. Brands such as Breville, Gaggia, Lelit, Rocket, ECM, Profitec, La Marzocco, and Bezzera each have models, generations, and aftermarket portafilters that deserve individual confirmation. If your machine has a recognizable brand name but the portafilter itself was bought separately, trust the actual portafilter measurement over a general compatibility chart.
The material of the new handle matters, too. A properly fitted metal thread insert inside a wooden handle protects the wood and gives the connection a durable bearing surface. The insert must match both the thread specification and the required engagement depth. Forcing a mismatched insert onto the stud can strip threads, crack a wood collar, or leave the handle loose during use.
Test fit without forcing the threads
Once you have a new handle, begin threading it by hand. It should catch smoothly and turn several full rotations with light pressure. If it resists immediately, stop. Back it off, inspect the first threads, and verify that the diameter and pitch are correct.
A correctly matched handle should tighten to a secure position without needing excessive force. If it bottoms out while still loose, the threaded cavity may be too shallow or the stud may be too long. If it becomes tight before the handle reaches its intended orientation, the shoulder, collar depth, or thread length may need adjustment. These are fitment details worth resolving before you use the portafilter under load.
Avoid pliers, thread tape, glue, or aggressive force as a shortcut. Thread tape can disguise a loose fit but will not correct the wrong pitch. Glue makes future servicing difficult and can turn a replaceable part into a damaged portafilter.
When to ask for a custom fit
If you have an uncommon portafilter, an older machine, a custom bottomless body, or a damaged original handle, measurements and photos are the fastest path to a good answer. NepoCoffee can use that information to help confirm the proper insert and handle configuration for a custom project.
Send the major diameter, pitch, usable thread length, machine model, and photos of the exposed stud and portafilter shoulder. If you are unsure about pitch, say so rather than guessing. A clear close-up beside a ruler or caliper is more useful than a confident but unverified thread label.
Your portafilter gets handled, heated, rinsed, and knocked through countless coffee sessions. Taking ten careful minutes to measure its threads gives a custom handle the solid, natural fit that makes the upgrade feel right every time you pull a shot.