Why Espresso Shots Spray and How to Fix Them
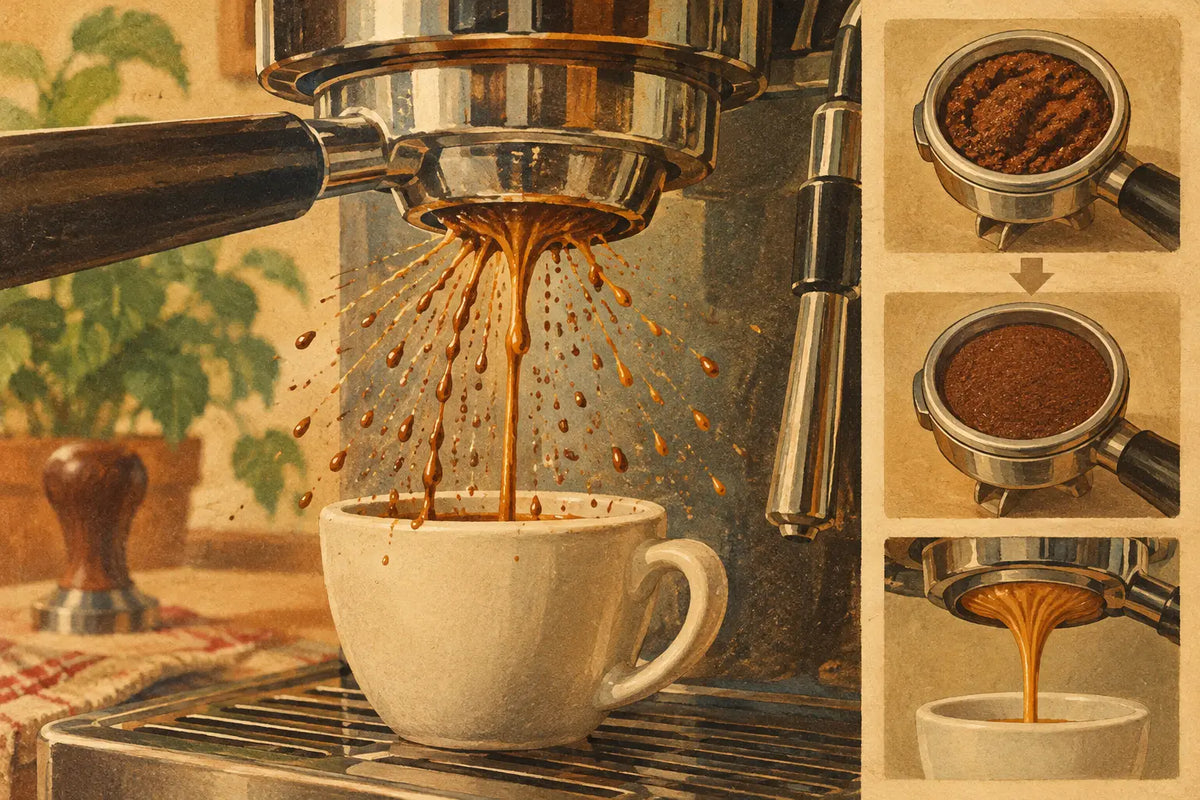
A naked portafilter gives immediate feedback. When the bottom of the basket starts with a calm, even bead and becomes a centered stream, your puck is doing its job. When it spits sideways, forms several thin jets, or sprays the group head and drip tray, it is showing you exactly where water found an easy way through.
If you are asking why espresso shots spray, the short answer is channeling. The useful answer is that channeling has several possible causes, and the fix is not always to grind finer or tamp harder. Your machine, grinder, basket, coffee dose, and puck-prep routine all need to work together.
A sprayed shot is not automatically a bad-tasting shot. Some coffees, especially fresh light roasts, can show a little movement from a bottomless basket while still tasting excellent. But dramatic jets, early blonding, fast flow, and a thin or harsh cup are strong signals that the puck needs more even resistance.
Why Espresso Shots Spray: Channeling in the Puck
Espresso water is under pressure. It will not move evenly through coffee just because the coffee is in the basket. It will look for the least resistant path, whether that path comes from an uneven grind, a clump, a gap along the basket wall, or a weak spot created during tamping.
Once water breaks through one area, the channel tends to widen. More water travels there, less water moves through the surrounding coffee, and extraction becomes uneven. The result at the bottom of a naked portafilter can be a sharp jet or a messy spray. In the cup, it often tastes simultaneously sour and bitter: underextracted coffee from most of the puck mixed with overextracted coffee from the channel.
A spouted portafilter can hide this behavior, so a bottomless portafilter is a valuable diagnostic tool. It does not create channeling. It simply makes the evidence visible.
Start With the Grind, Not the Tamper
Grind size is usually the first adjustment to check. If your shot begins running quickly, sprays early, and reaches your target yield too soon, the grind is probably too coarse. Coarser particles leave larger gaps, making it easier for pressurized water to punch through the puck.
Move finer in small increments, then repeat the same recipe. For a starting point, many home baristas use a 1:2 brew ratio - for example, 18 grams of dry coffee in and 36 grams of espresso out. The ideal time depends on the coffee, machine, and desired flavor, but a shot that reaches that yield in roughly 25 to 35 seconds is often in a workable range.
There is a trade-off. Going too fine can choke the machine or create a slow, harsh shot. It can also make distribution more difficult if your grinder produces clumps. Adjust one variable at a time, taste the result, and use the flow from the naked portafilter as supporting information rather than the only goal.
Grinder condition matters as much as the setting. Dull burrs, excess retention, static-heavy grounds, or a grinder that is not aligned well can make consistent puck preparation frustrating. If one shot sprays and the next does not despite identical technique, look closely at dose consistency and grinder output before blaming your tamp.
Distribution Is Where Many Sprays Begin
Even a good grinder can leave a mound of coffee on one side of the basket or dense clumps below the surface. Tamping that mound flat does not necessarily make the density inside the puck even. The puck may look perfect from above while still containing a path for water to exploit.
A dosing funnel helps keep grounds centered and prevents waste while you distribute. This is especially useful with 58 mm baskets, where a full dose can easily spill over the rim before you have a chance to level it. It also makes a slower, more deliberate workflow less messy.
Use a WDT tool with fine needles to gently break up clumps and move grounds into an even layer. Work through the full depth of the coffee bed without aggressively stirring or scraping the basket. The aim is not to whip air into the dose. The aim is to remove dense pockets and fill low areas before tamping.
After WDT, settle the grounds lightly and level them. A few gentle taps can help, but repeated hard tapping may separate particles and undo some of the evenness you just created. Consistency is more valuable than a complicated ritual. Choose a sequence you can repeat every morning: dose, distribute, level, tamp, brew.
Tamp Flat and Firm Enough
Tamping pressure gets more attention than it deserves. Once the coffee is sufficiently compressed, pressing dramatically harder rarely solves channeling. A level tamp, however, matters a great deal.
If the puck is tilted, water will favor the thinner side. That can show up as a stream that pulls to one edge, then sprays as the weak area erodes. Keep the tamper level, use a stable stance, and press straight down. A tamper sized properly for your basket makes this easier because it leaves less unsupported coffee near the wall.
Check your tamper fit before buying a new one. Precision baskets may need a more closely matched tamper than a standard stock basket. A tamper that is too small can leave a ring of loose grounds around the edge, while one that is too large can bind against the basket wall. Both situations can encourage uneven extraction.
A quality handle can improve the feel of your workflow, but the base diameter and flatness are what influence puck preparation. If you are customizing your bar with a handcrafted wood handle, make sure the working end still matches the basket you actually use.
Check Dose, Headspace, and Basket Match
An incorrect dose can cause spray even when the grind and distribution are solid. Underfilling leaves excess headspace, which may let water hit the puck with more force and disturb the surface. Overfilling can cause the puck to press hard into the shower screen, creating an uneven or fractured top before brewing begins.
Your basket is designed around a dose range, not one magical number. If you use an 18-gram basket, test doses near that range rather than forcing 21 grams into it because that is your preferred recipe. After brewing, inspect the puck. A faint shower-screen impression can be normal, but deep imprints, torn surfaces, or a muddy puck that sticks to the screen suggest you need to revisit dose and headspace.
Also make sure your portafilter basket is clean and seated properly. Coffee oils and blocked holes can change flow patterns. A damaged basket, bent portafilter, or worn group gasket can create problems that look like puck-prep errors. If your portafilter suddenly locks in at a very different angle or leaks from the rim, address the fitment issue before chasing grinder settings.
Water Delivery Can Be the Problem
Not every spray begins in the puck. An uneven or partially blocked shower screen can send water into the coffee bed inconsistently. Remove and clean the screen according to your machine's instructions, and inspect it for debris or mineral buildup. Backflush regularly if your machine supports it.
Machines with flow control add another variable. Opening flow fully at the start can be right for many coffees, but some light roasts benefit from a gentler preinfusion that allows the puck to saturate before full pressure arrives. This can reduce sudden channel formation. The trade-off is that flow profiling adds another variable to manage, so establish a dependable standard recipe first.
Freshness also affects the way a puck behaves. Very fresh coffee can release a lot of gas and look lively under a naked portafilter. Coffee that is extremely old may run thin and fast because it has lost much of the carbon dioxide that helps create resistance. Neither condition is fixed by tamping alone.
A Practical Way to Diagnose Spraying Shots
Change one thing, pull another shot, and watch when the spray begins. If it sprays immediately and runs fast, start with a finer grind. If it begins evenly but turns into jets later, look at distribution, puck integrity, or an overly long shot. If one side always misbehaves, check tamp level, basket cleanliness, and shower-screen coverage.
Keep your dose, yield, and temperature steady while you test. A small scale under the cup is more useful than guessing from volume, particularly with coffees that produce different amounts of crema. Make notes for a few shots. Espresso gets much easier when you can connect a visible behavior to a repeatable adjustment.
A clean, centered extraction is satisfying, but the cup still gets the final vote. Use the naked portafilter to learn what your puck is doing, then let sweetness, balance, and texture guide the last adjustment. With a dialed-in grinder, a basket that fits your recipe, and a calm, repeatable prep routine, that wild spray will usually settle into the kind of shot your machine was built to make.